Tutorial: How to create a pattern in Hydroman.
Goal:
Creating your own patterns. In this tutorial we’ll walk through the steps of creating a new drilling pattern.
Steps:
A drilling pattern is basically a Hydroman file with multiple holes in it. There are two different ways to create a pattern.
- The first is to create from schratch using the an empty pattern file.
- The second is to create a pattern from different holes on a manifold.
Starting with an empty pattern file
When starting from an empty pattern file you will only be able to work in one face, this is because for a standard pattern more isn’t required. The isometric viewer is also disabled when creating a pattern file.
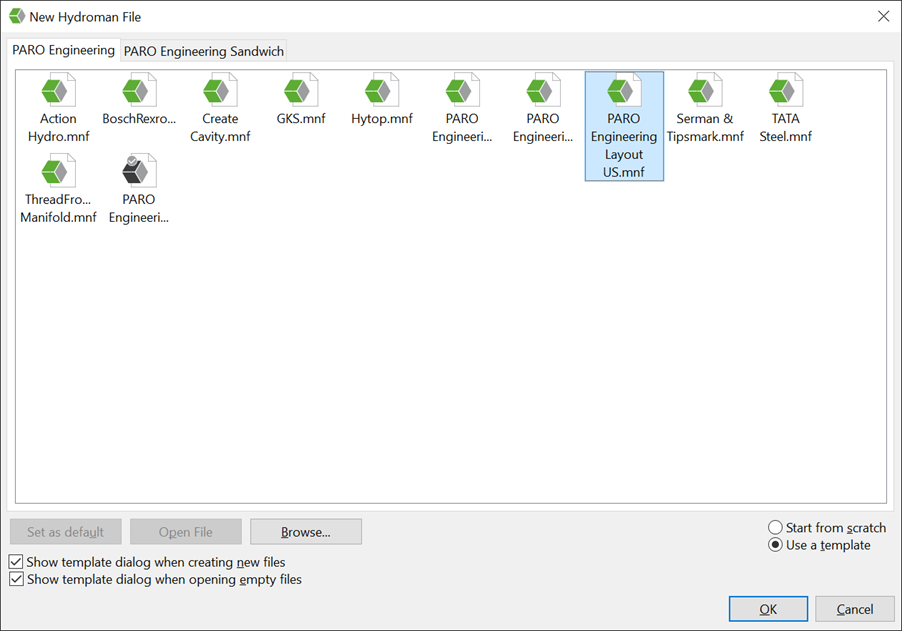
- Navigate to ‘File’ → ‘New’ or press [Ctrl + N] and select the default pattern file (.ptr)
In Hydroman the window will now be empty. It is possible to start adding holes for the pattern. The first hole that’s created will be the reference point (0,0) for all the following holes. [Note: Usually the high pressure port (P) is used for reference.]
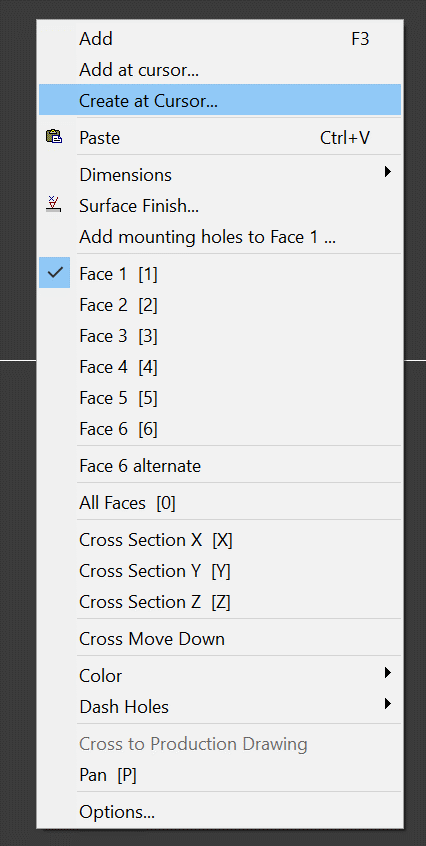
When the right mouse button is pressed in the empty space, three different options will be shown for adding a hole.
| Add [F3] | Will let you select a hole from the library to be added to the pattern. This will always add the hole at the reference point (0,0). |
| Add at Cursor | Will also let you select a hole from the library to be added to the pattern, but it will be placed on the coordinates of the cursor. |
| Create Hole at Cursor | Will create a new hole at the coordinates of the cursor |
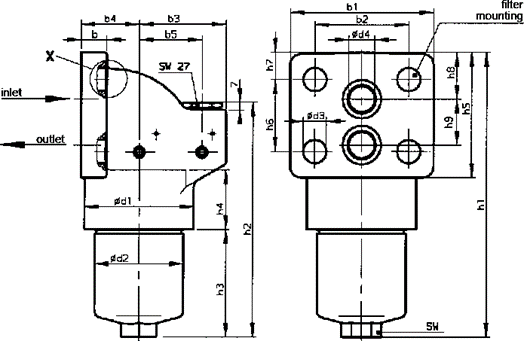
For this tutorial we will use the following filter pattern from Hydac as an example.

We’ll start with creating the inlet port.
- Right click in the empty space and select ‘Create Hole at Cursor’
The next window will pop-up. In this window you can set the diameter and default depth of the hole.
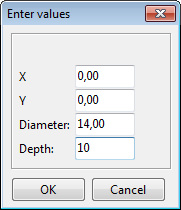
The default depth isn’t very important as you will most likely change it when creating a manifold. You can also set the coordinates but as this will be used for the reference hole you can leave it at 0,0.
- Set the diameter to 14 and depth to any desired value
- Press ‘OK’ to accept the values
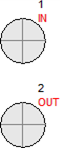
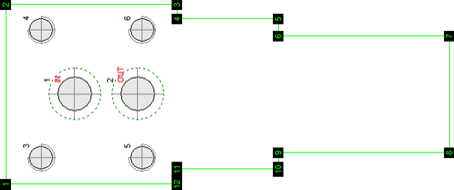
Now move and copy the port 28mm below the inlet port. You can this by using [space] to move the hole and hold [Ctrl] to copy it. The position of the second hole should be (0,-28). Now that both the inlet and outlet port are created we can name the ports.
- Select the inlet port
- Press [R] to create a remark
- Type in the desired name for the port in between apostrophes (e.g.; ‘IN’)
[Note: you can choose any name for the port as long as it matches the port name in the Hydrosym symbol]
Also add the remark for the outlet port. We’ve named the inlet port ‘IN’ and outlet port ‘OUT’ so the pattern now looks like the image below.
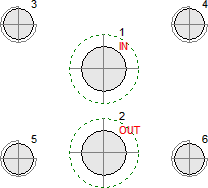
Now to indicate the size of the O-rings we’ll use hole contours. The outside diameter of the O-rings should be used, in this case it’s the inside diameter plus two times the thickness so: ⌀18 + 2 × 2,5 = ⌀23 mm.
- Select both holes
- press the right mouse button in one of the holes and select ‘Hole Contour…’ or press [Ctrl + F3]
- In the window that pops up set the hole contour to be ⌀23 mm
- Press ‘OK’ to accept the value
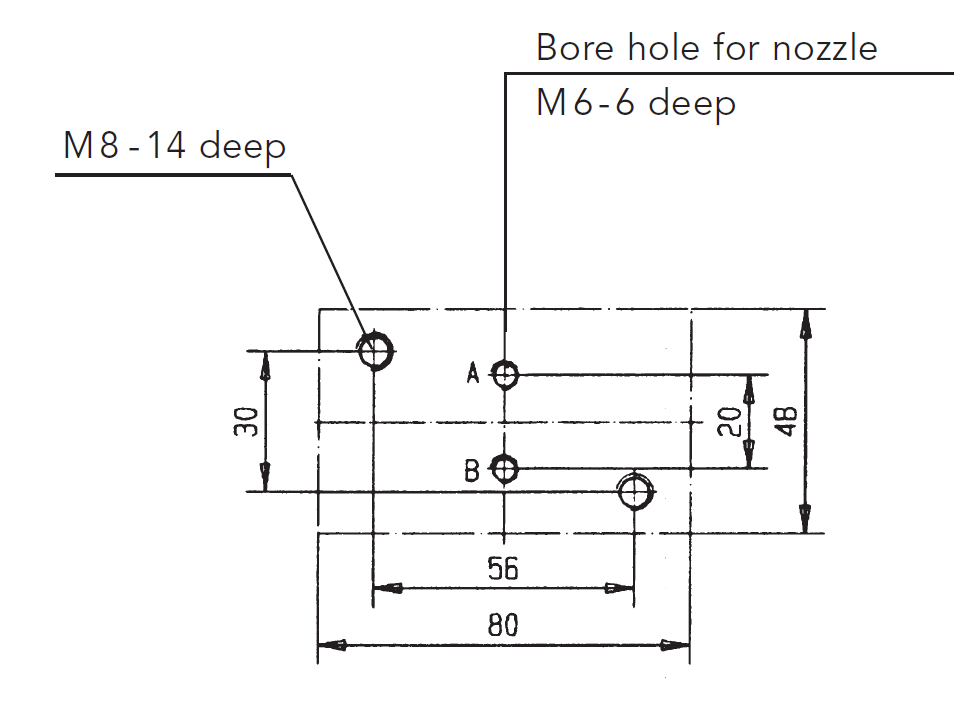
Now the O-rings will be indicated by dashed circles around the ports. Now we will add the threaded holes for mounting the filter. If no bolt size is specified check the size of the hole in the filter and simply make the depth of the thread two times the diameter of the thread. In this case the holes in the filter housing are ⌀13 mm so we’ll use M12 threads with 24 mm depth.
- Right click in the empty space where a threaded hole would need to be placed.
- Select ‘Add at Cursor’
The library will pop up where you can select different components or files.
- Select the ‘Files’ tab and navigate to ‘Mounting’ → ‘Metric_2_d’
- Select ‘M12’ and press ‘Select’ to continue or simply double click ‘M12’
Now the threaded hole is added from the library to the pattern.
- Select the threaded hole and press [Shift + Enter] to edit the coordinates
- In the window that pops up set the right coordinates (for the top left one; -28,5 and 15)
You can now add the other three threaded holes the same way or simply move and copy them with [Space] and holding [Ctrl]. It can be made easy when orthogonal [O] movement and relative values [L] are toggled.
- Create the other three mounting holes.
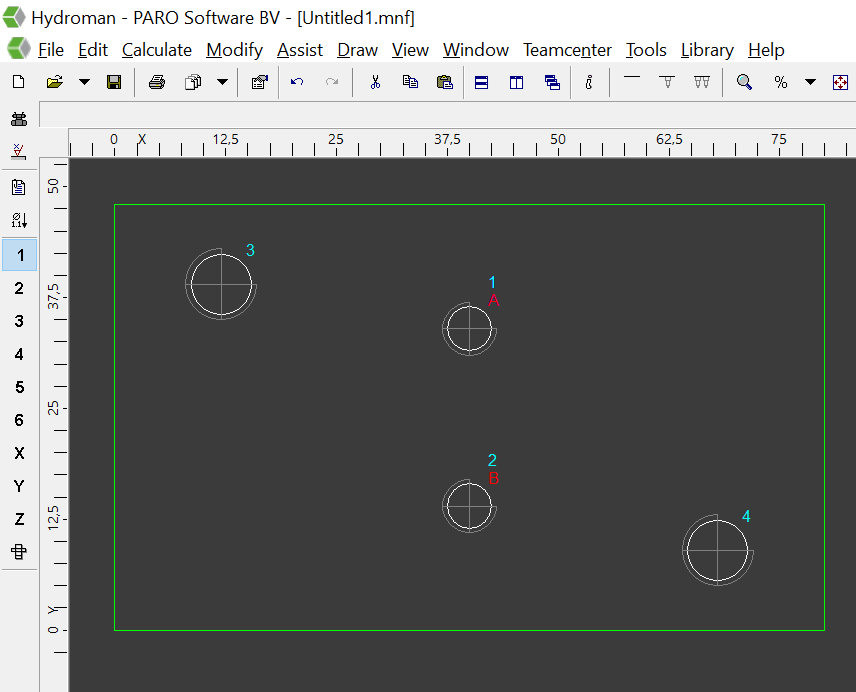
The pattern should now look like the image below.
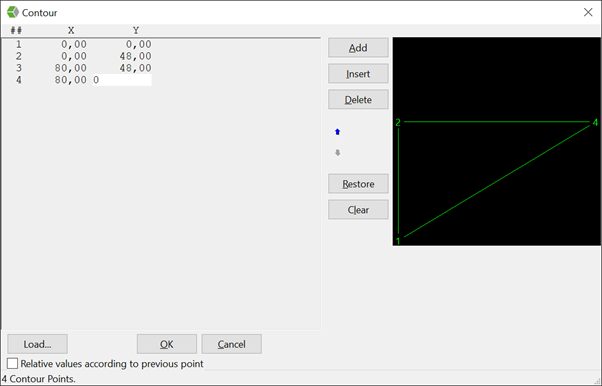
Now all the holes for the pattern are created we can create a contour for the filter that will be mounted on the drilling pattern. This way you can see where other components around the filter will be able to fit.
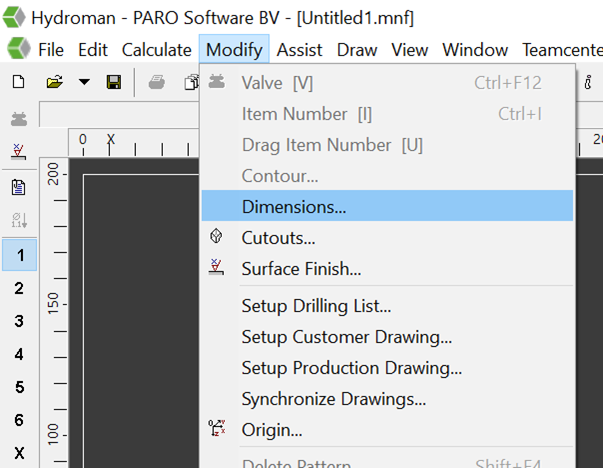
- Navigate to ‘Modify’ → ‘Contour…’ or right click anywhere in the empty space and select ‘Contour…’
A window will pop up where you can add a contour to the pattern, a contour is defined by adding the coordinates of the corners of the contour on the left side.
On the right side you can see a preview of the contour.
When you only add one value, the contour will be a circle around the reference point with the given diameter.
For this filter we will add multiple corner points of the contour.
We will start with the top left corner (-40 and 30,5) and go around clockwise.
[Note: It can prove very useful to toggle relative values with the check box in the bottom left]
When finished the contour should look like the following, but you can make it as detailed as you like.
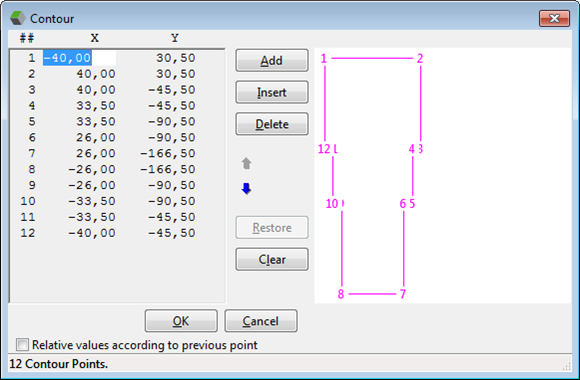
- Press ‘OK’ to create the contour
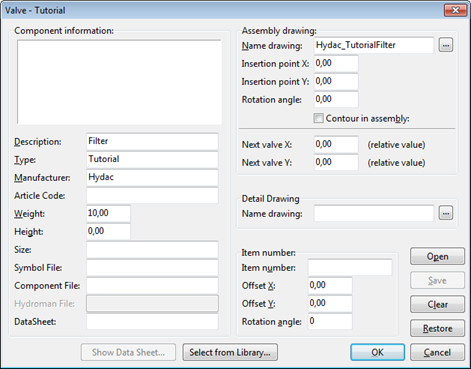
Now the drilling pattern is finished and the contour is created we can add some information to the pattern but it is not required. You can go to ‘Valve List’ [V], and press ‘Add’ to fill out some information.
ave the pattern file to the desired position in the library. Don’t forget to refresh the library afterwards.
Create a pattern from different holes on a manifold
In this example the pattern for the VCM 02-04 (Kracht) is used.
- Start a new hydroman file (or use an open file).
-
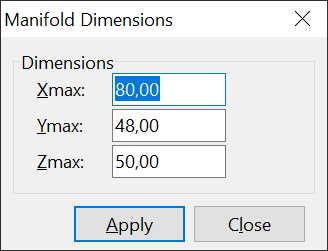
Change the dimensions from the to the outside of the pattern.
This will help postion your holes easier. The Z coordinate is not important.
- Now with your right mouse somewhere on Face1 and select
- You will see this window.
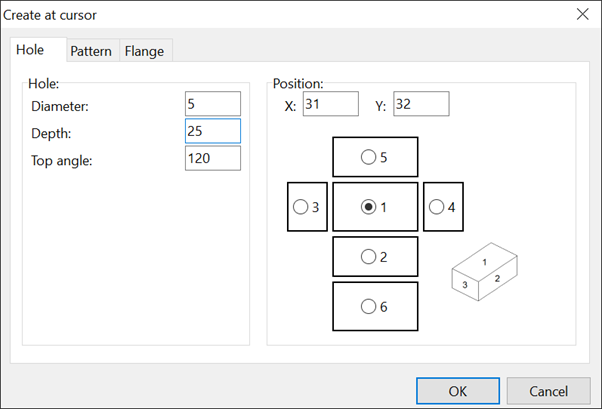
- Enter the diameter 5 for the M6 thread and the 25.
- Select the created hole and press enter.
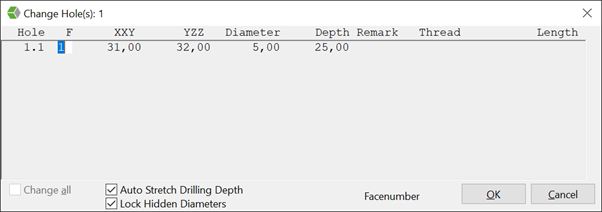
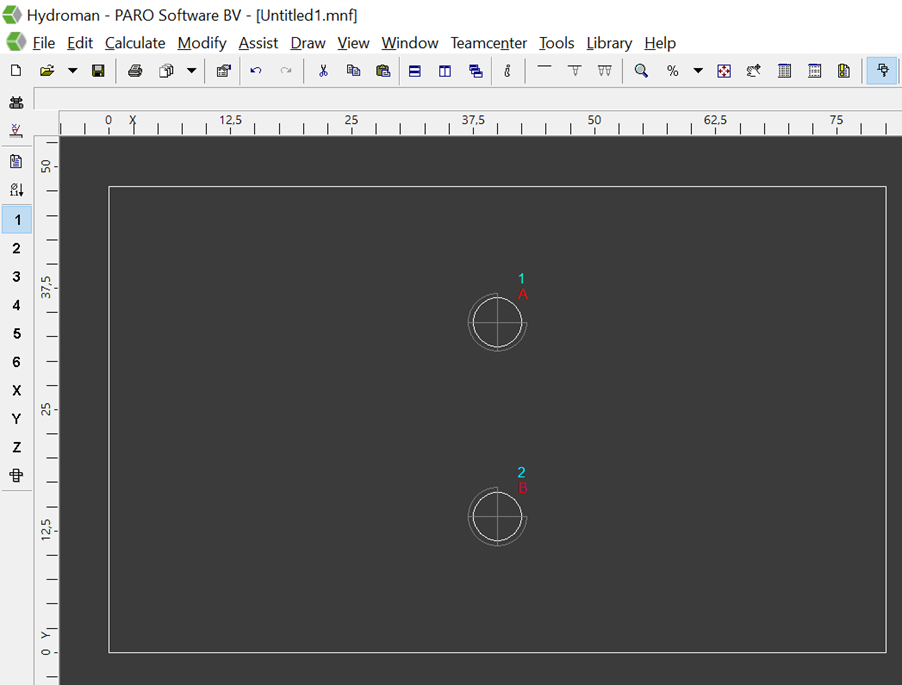
- Now change the position and the thread for this hole. For the X 40, for the Y 34, for the Remark ’A’ , for the Thread M6 and Length 6 and press OK

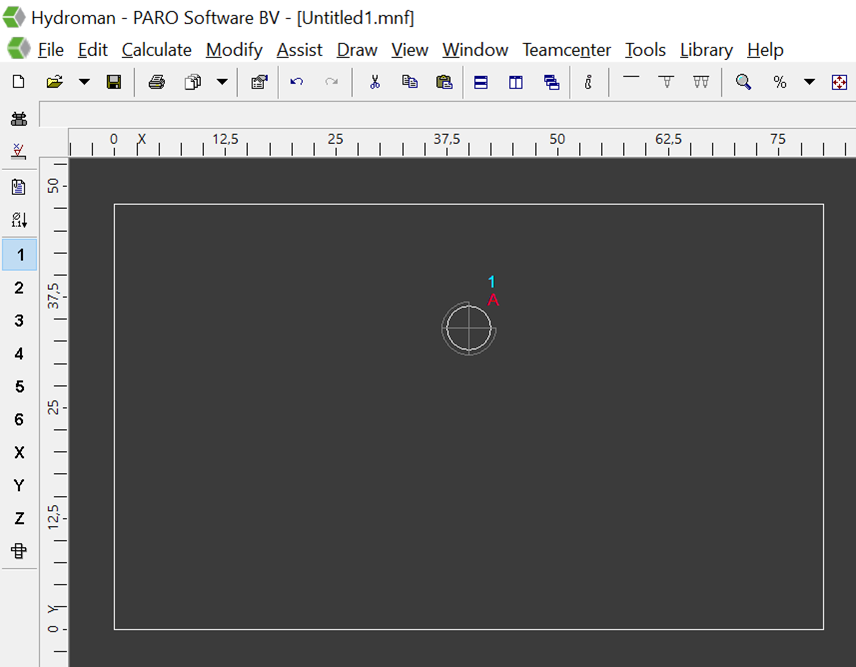
The hole is now in the right position. Here comes the dimensions I earlier changed in place. It is easier to calculate like that where to put the hole.
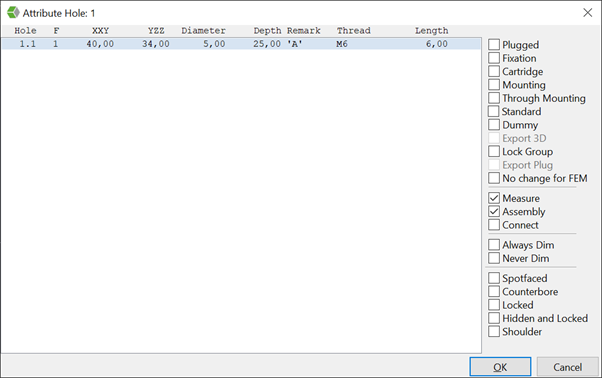
- Select the hole and press A on your keyboard. The attribute dialog will appear. Mark Measure and Assembly. In this way port will be measured in the production drawing.
- Copy hole with CTRL C and CTRL V press enter and change the Y to 24 and change the remark to B.
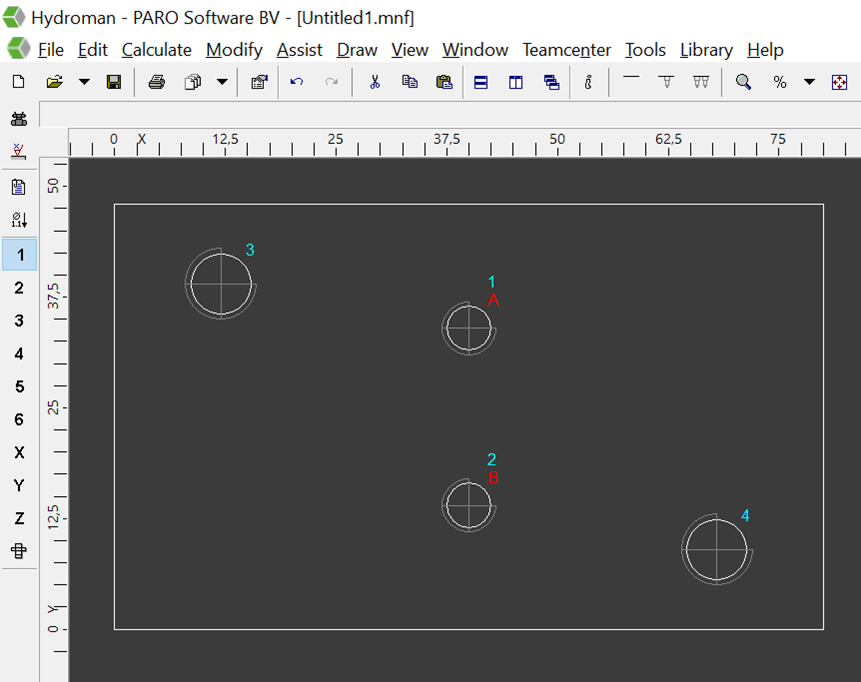
- now add the mounting holes you drag them from the library at files in your block.

- Select the hole and change the position and thread length and so on. Copy the hole and put it on the other coordinate.
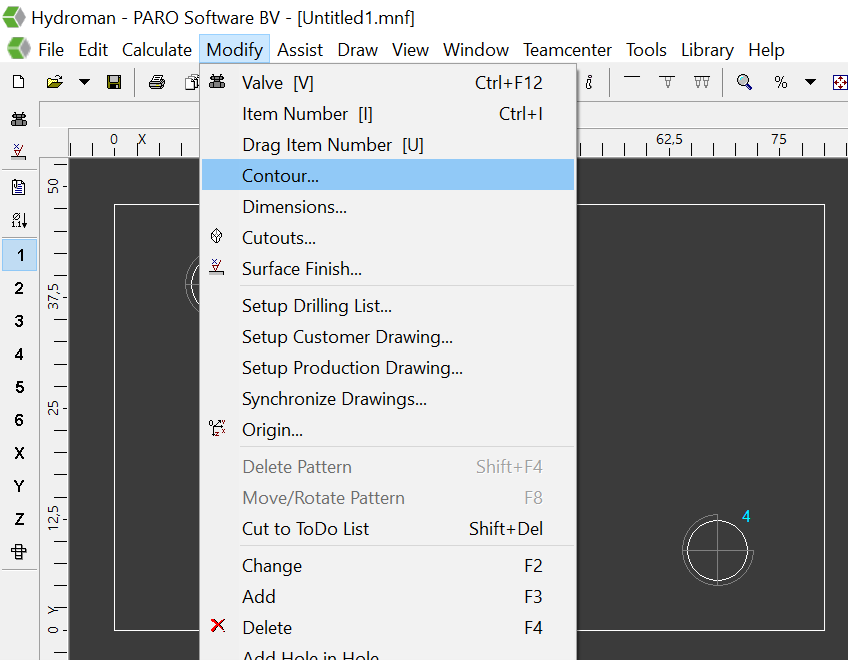
- Select hole 1 then right mouse button and select contour from the Modify menu tab.
You will see this window.
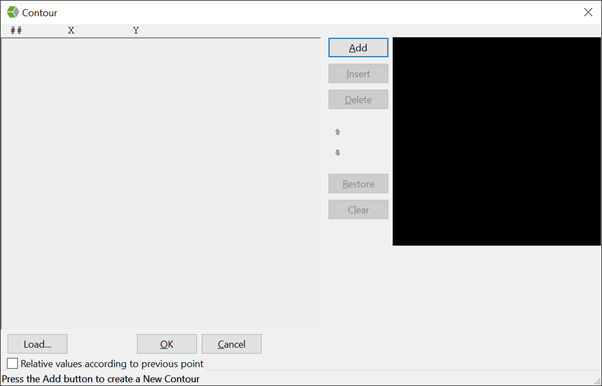
- Press Add and give in the coordinates for the outside off the pattern.
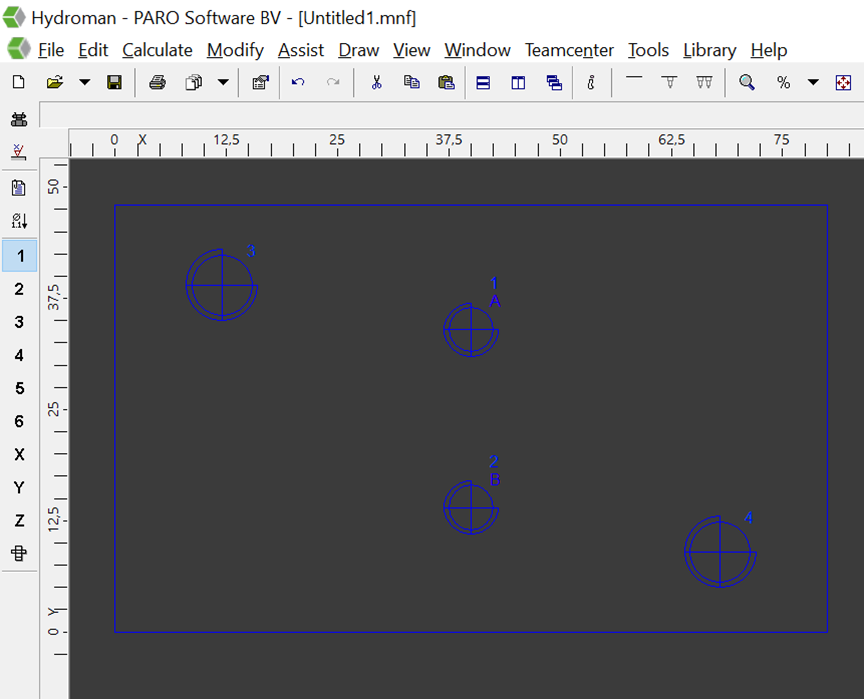
Press ok. It now looks like
The green line is the outside of your pattern.
- Now select all the holes.
- Go to the assist tab and select Group holes
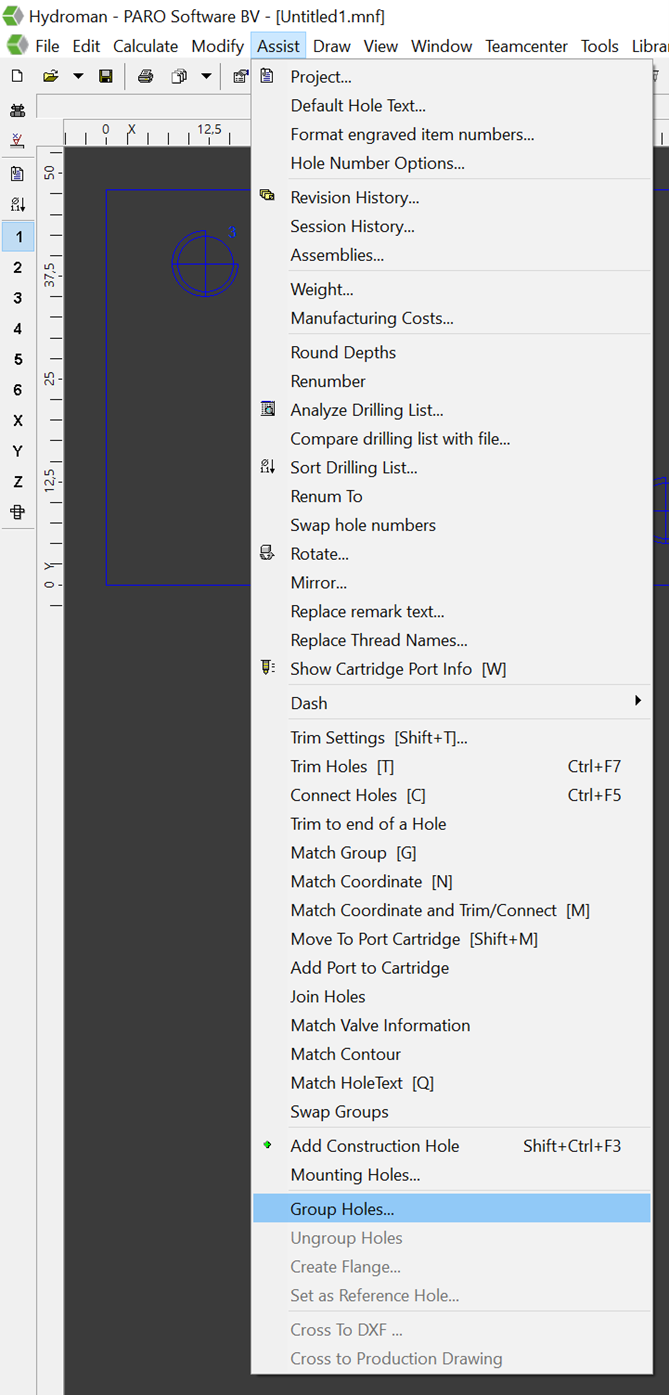
You will see the next window.
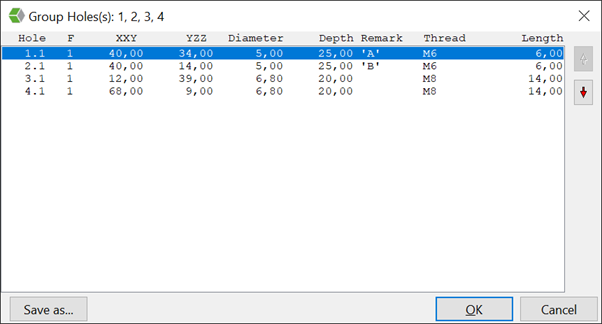
In this case the A port is the insertion hole on your manifold it can be that it is somewhere else in the list. Then select the hole and move it with the on the of this to the right position. Now you can use Save as… and save the file in the following directory
…\Libraries\Hydroman files . You can make sub folders if you want.
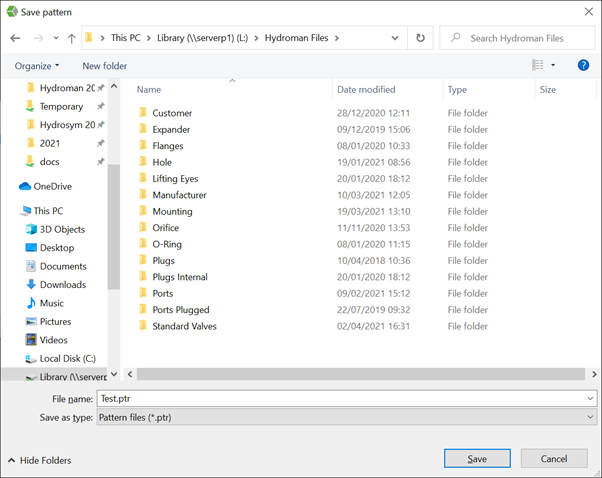
After pressing Save you will see this window

You can add information if you want but is not necessary. Press ok and then cancel to close the other window. Now you have made a PTR file which you can use. The open file you have you can close. You do not have to save it but I always keep those files (somewhere for example on your desktop) in case I have to change something afterwards.
Refresh your library after creating the ptr file otherwise you will not see it.
What we have done is in fact creating a manifold and grouped and save the holes on the manifold.